AWS Elastic Beanstalk
This page explains in just 3 steps how to get your node up and running using AWS (Amazon Web Services) Elastic Bean Stalk Applications.
So you decided you want to be part of the LTO Network, awesome!
A great way to be part of the community is by actively participating as a node in the network. Running an AWS Elastic Bean Stalk LTO Network Public node will set you back around 1.10 dollar per day. You can use our Community ROI calculator to get an indication of your possible earnings.
Make sure to check out the Prepare: Setup your wallet page before continuing. The node setup pages assume you utilize a 2-wallet setup for extra safety.
Step 1: Preparing the setup of the node
Do you have an AWS account? If not set one up through https://console.aws.amazon.com/.
In step 2 we will configure the actual Elastic Bean in AWS. In that step we assume you were successful in the creation of your AWS account.
The last step in preparation is the download of the: “Dockerrun.aws.json” file from the Github repository (https://github.com/ltonetwork/lto-public-node). Download this file (https://raw.githubusercontent.com/ltonetwork/lto-public-node/master/Dockerrun.aws.json) to your system and zip it using your favourite archive tool.
Step 2: Setting up the AWS Elastic Bean Stalk application
Open the AWS interface: https://console.aws.amazon.com/elasticbeanstalk/home?region=us-east-1#/applications. If you want to change the AWS region where you want to host your application this is the time.
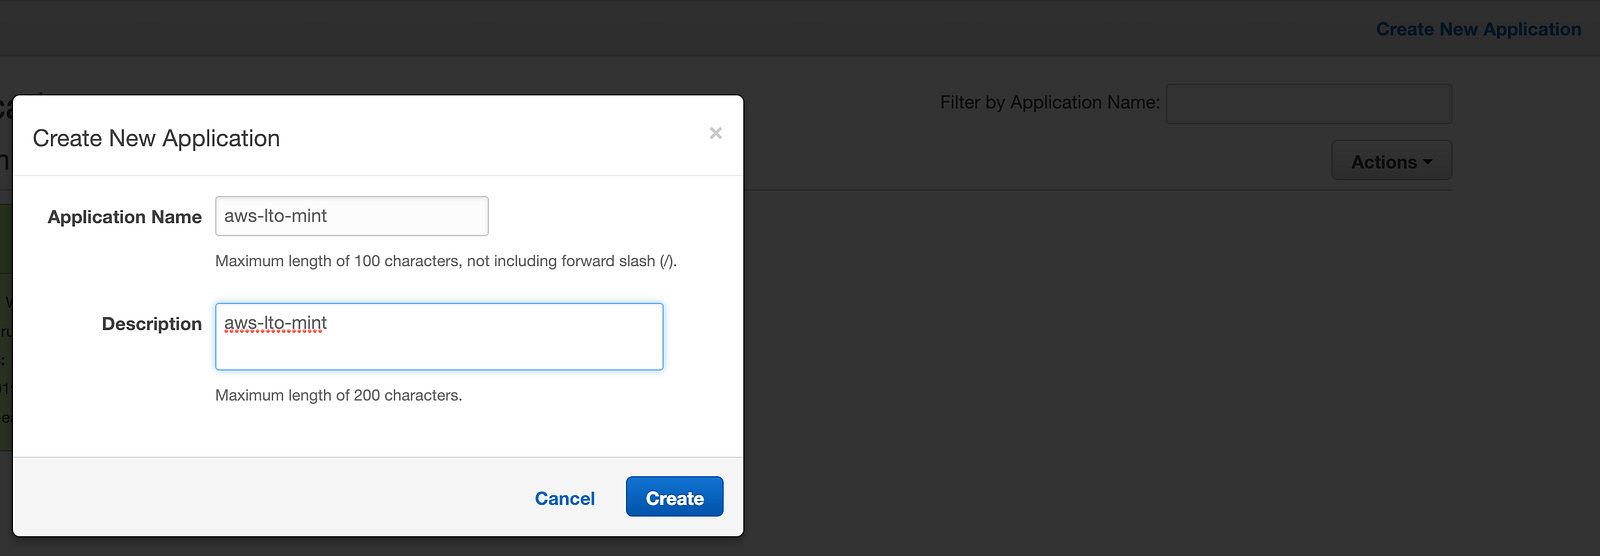
Let’s create our application by clicking “Create New Application”:
Specify an Application name and a Description. Just choose yourself.

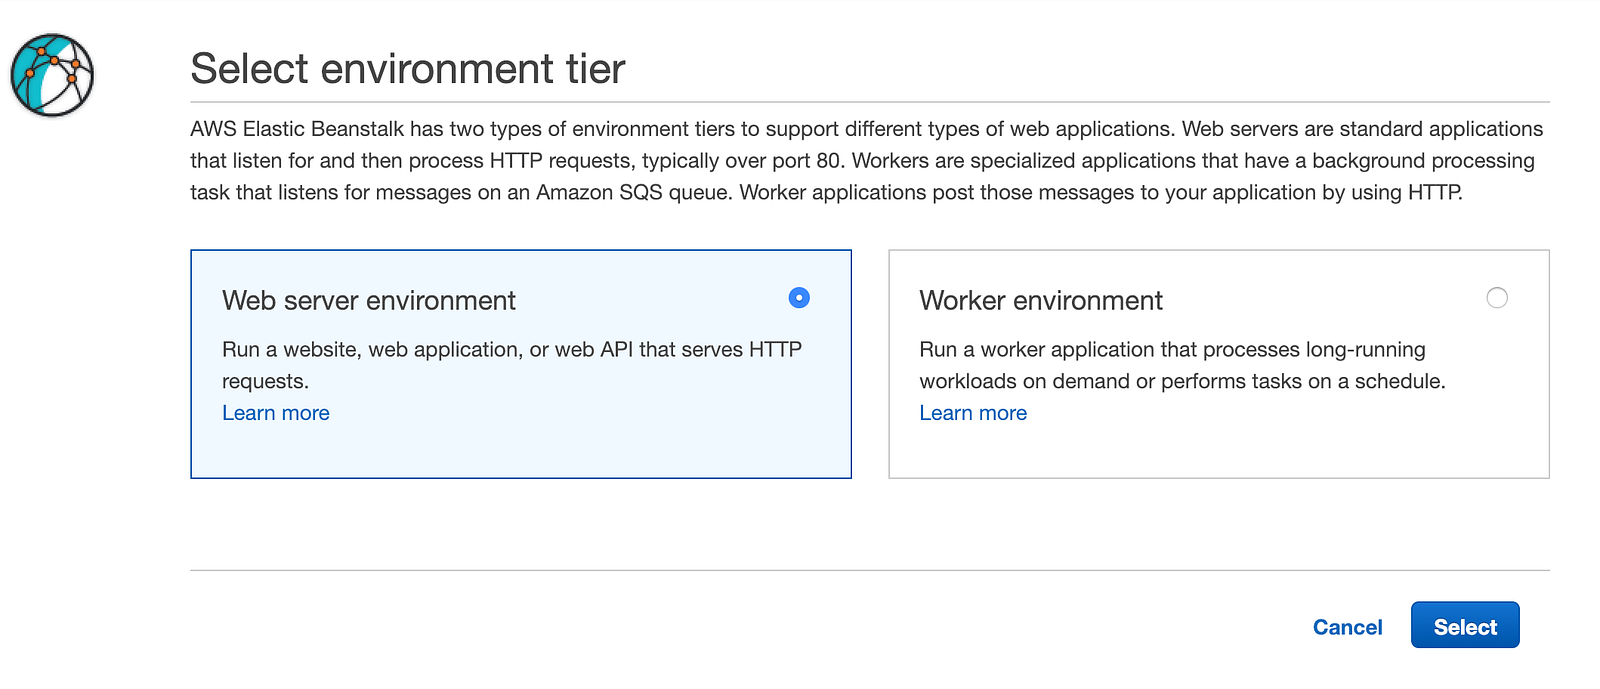
Next step is to create the environment. This will be the actual node:
Select the “Web server environment” tier and click “Select”.
In the next screen we need to specify a few things:
Choose a name for the environment, you choose yourself.
You can choose a name for the domain. This will be the first part of the url where you can reach your node if you choose the enable the API later on. If you don’t fill in anything here the system will auto-generate.
Fill in a description if you want.
Make sure to specify “Docker” as the Preconfigured platform.
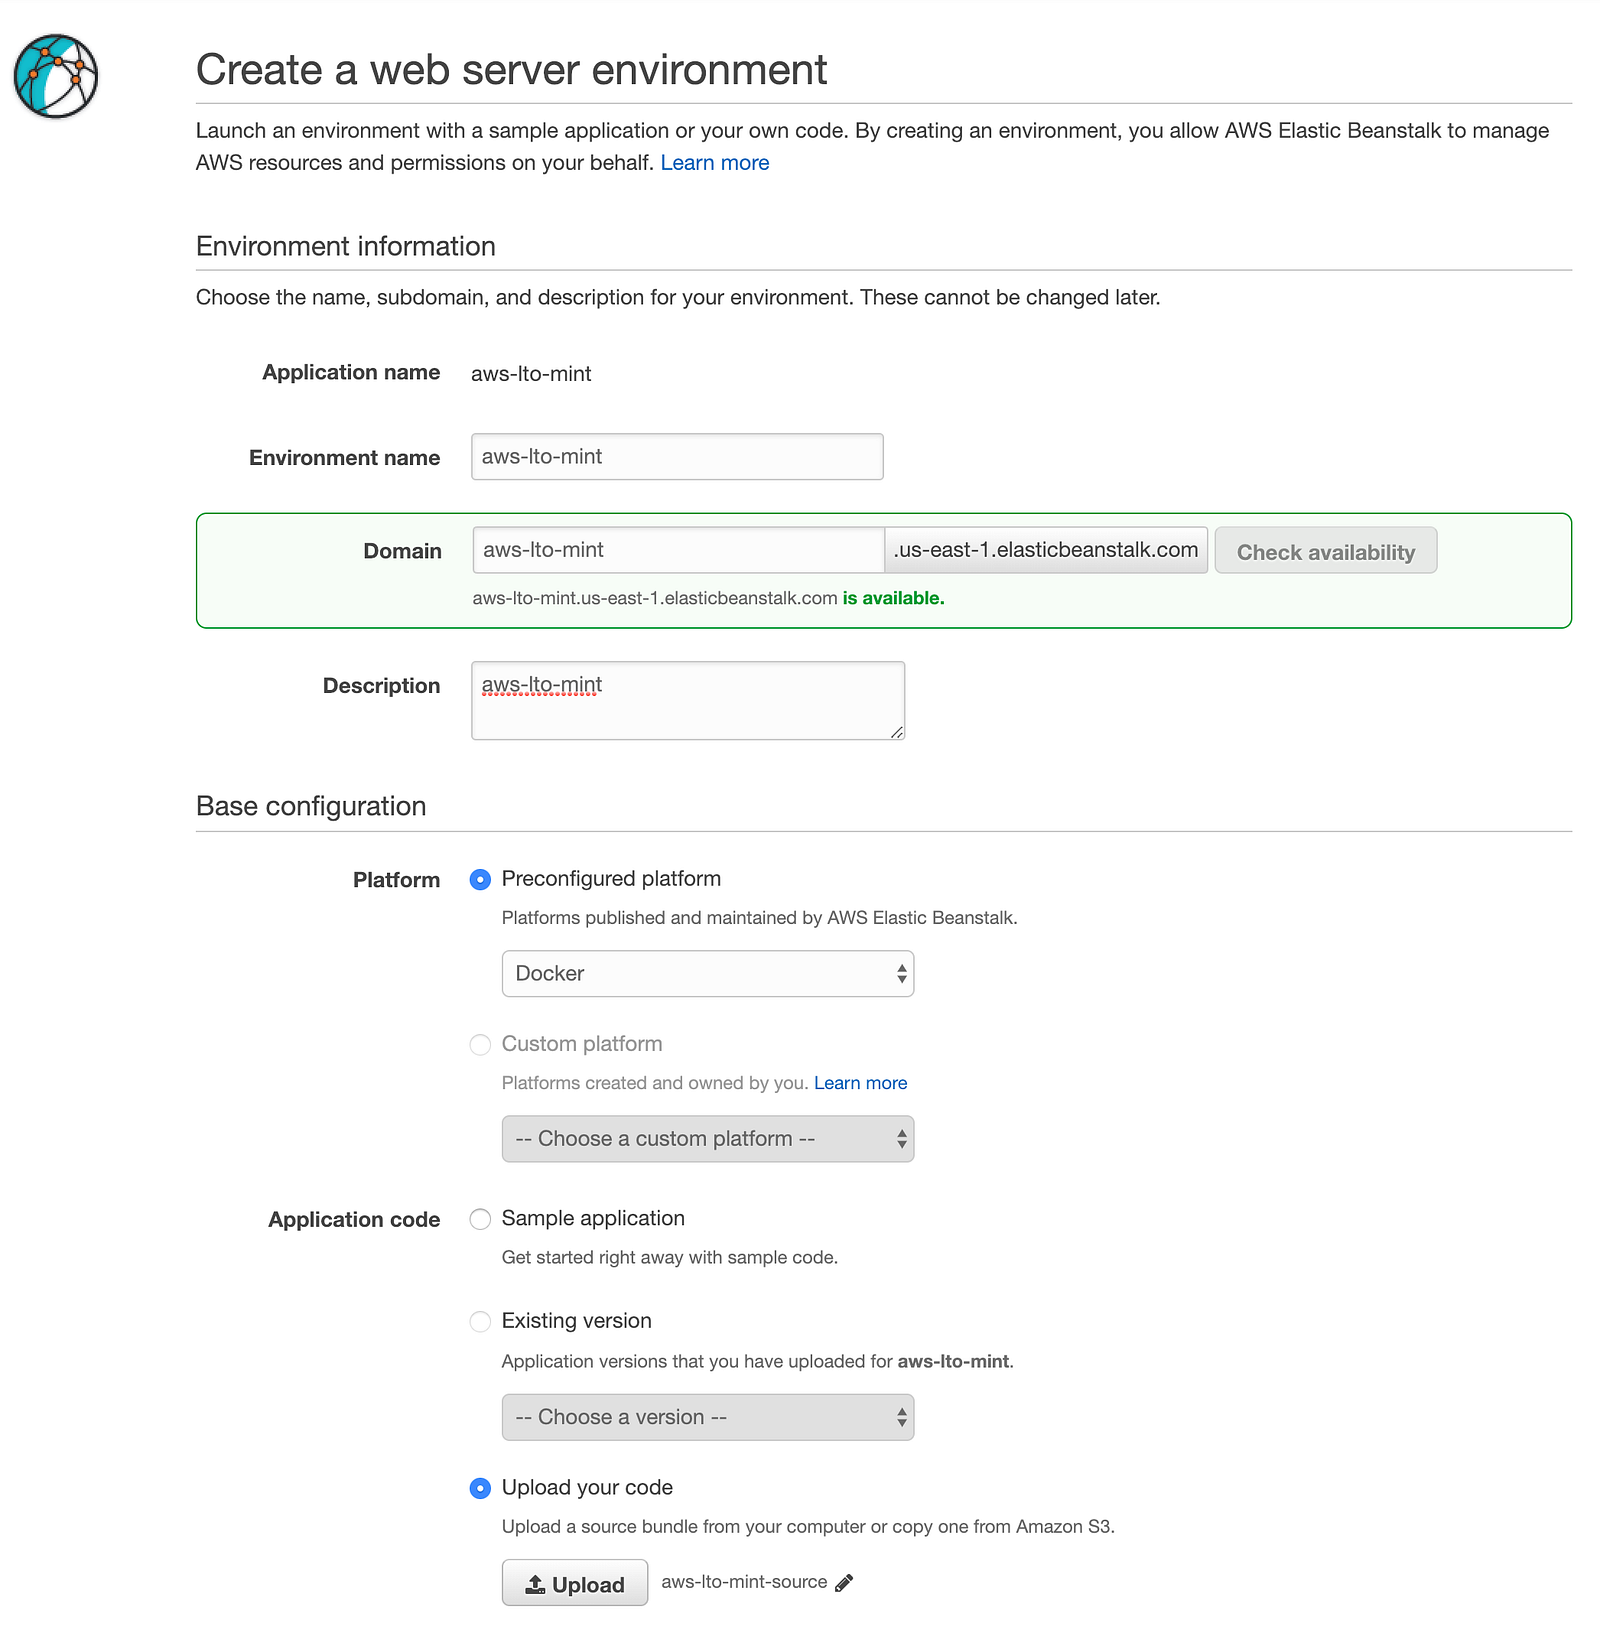
Finally select the “Upload your code” option under “Application code” and click the Upload button.
Clicking the Upload button gives you the opportunity to “Choose File” the zip file (Dockerrun.aws.json.zip) you created earlier.
 Upload your code screen — Click upload after selecting the file.
Clicking the Upload button brings us back to web environment creation screen. We need to configure some additional things so let’s click the “Configure more options” button.
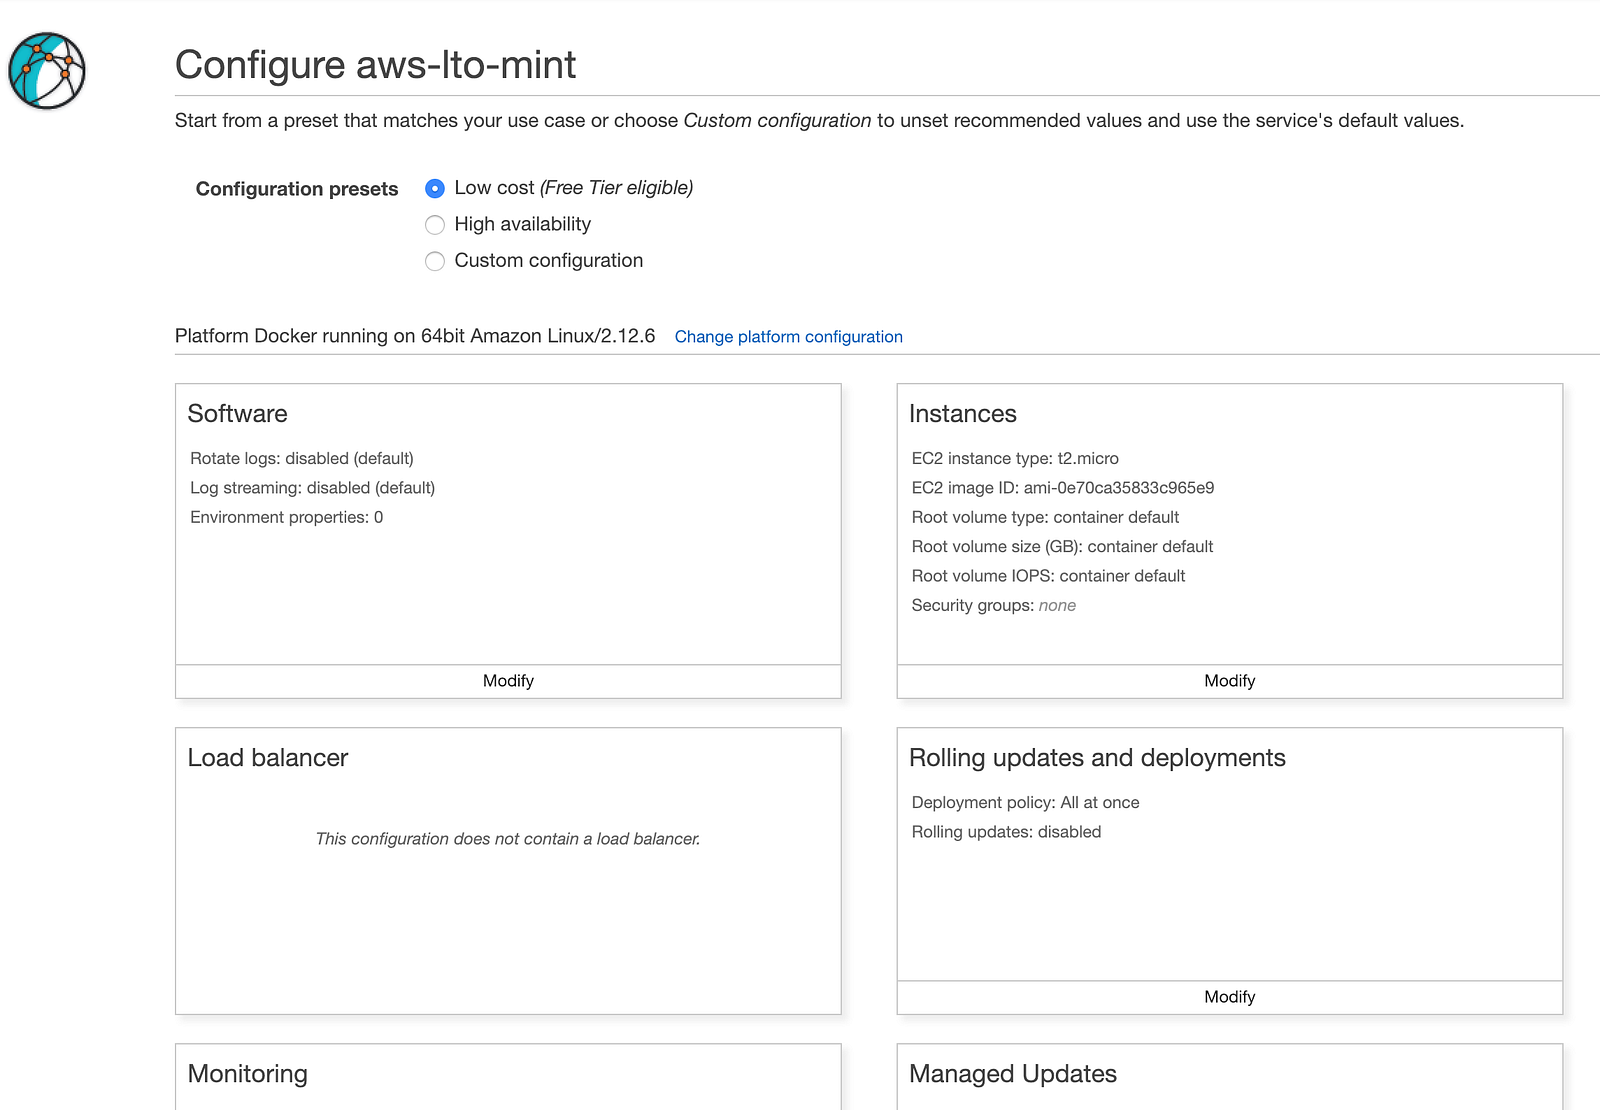
We want to change the following things:
Instances, click modify: EC2 instance type, change to: t2.small
Software, click modify:
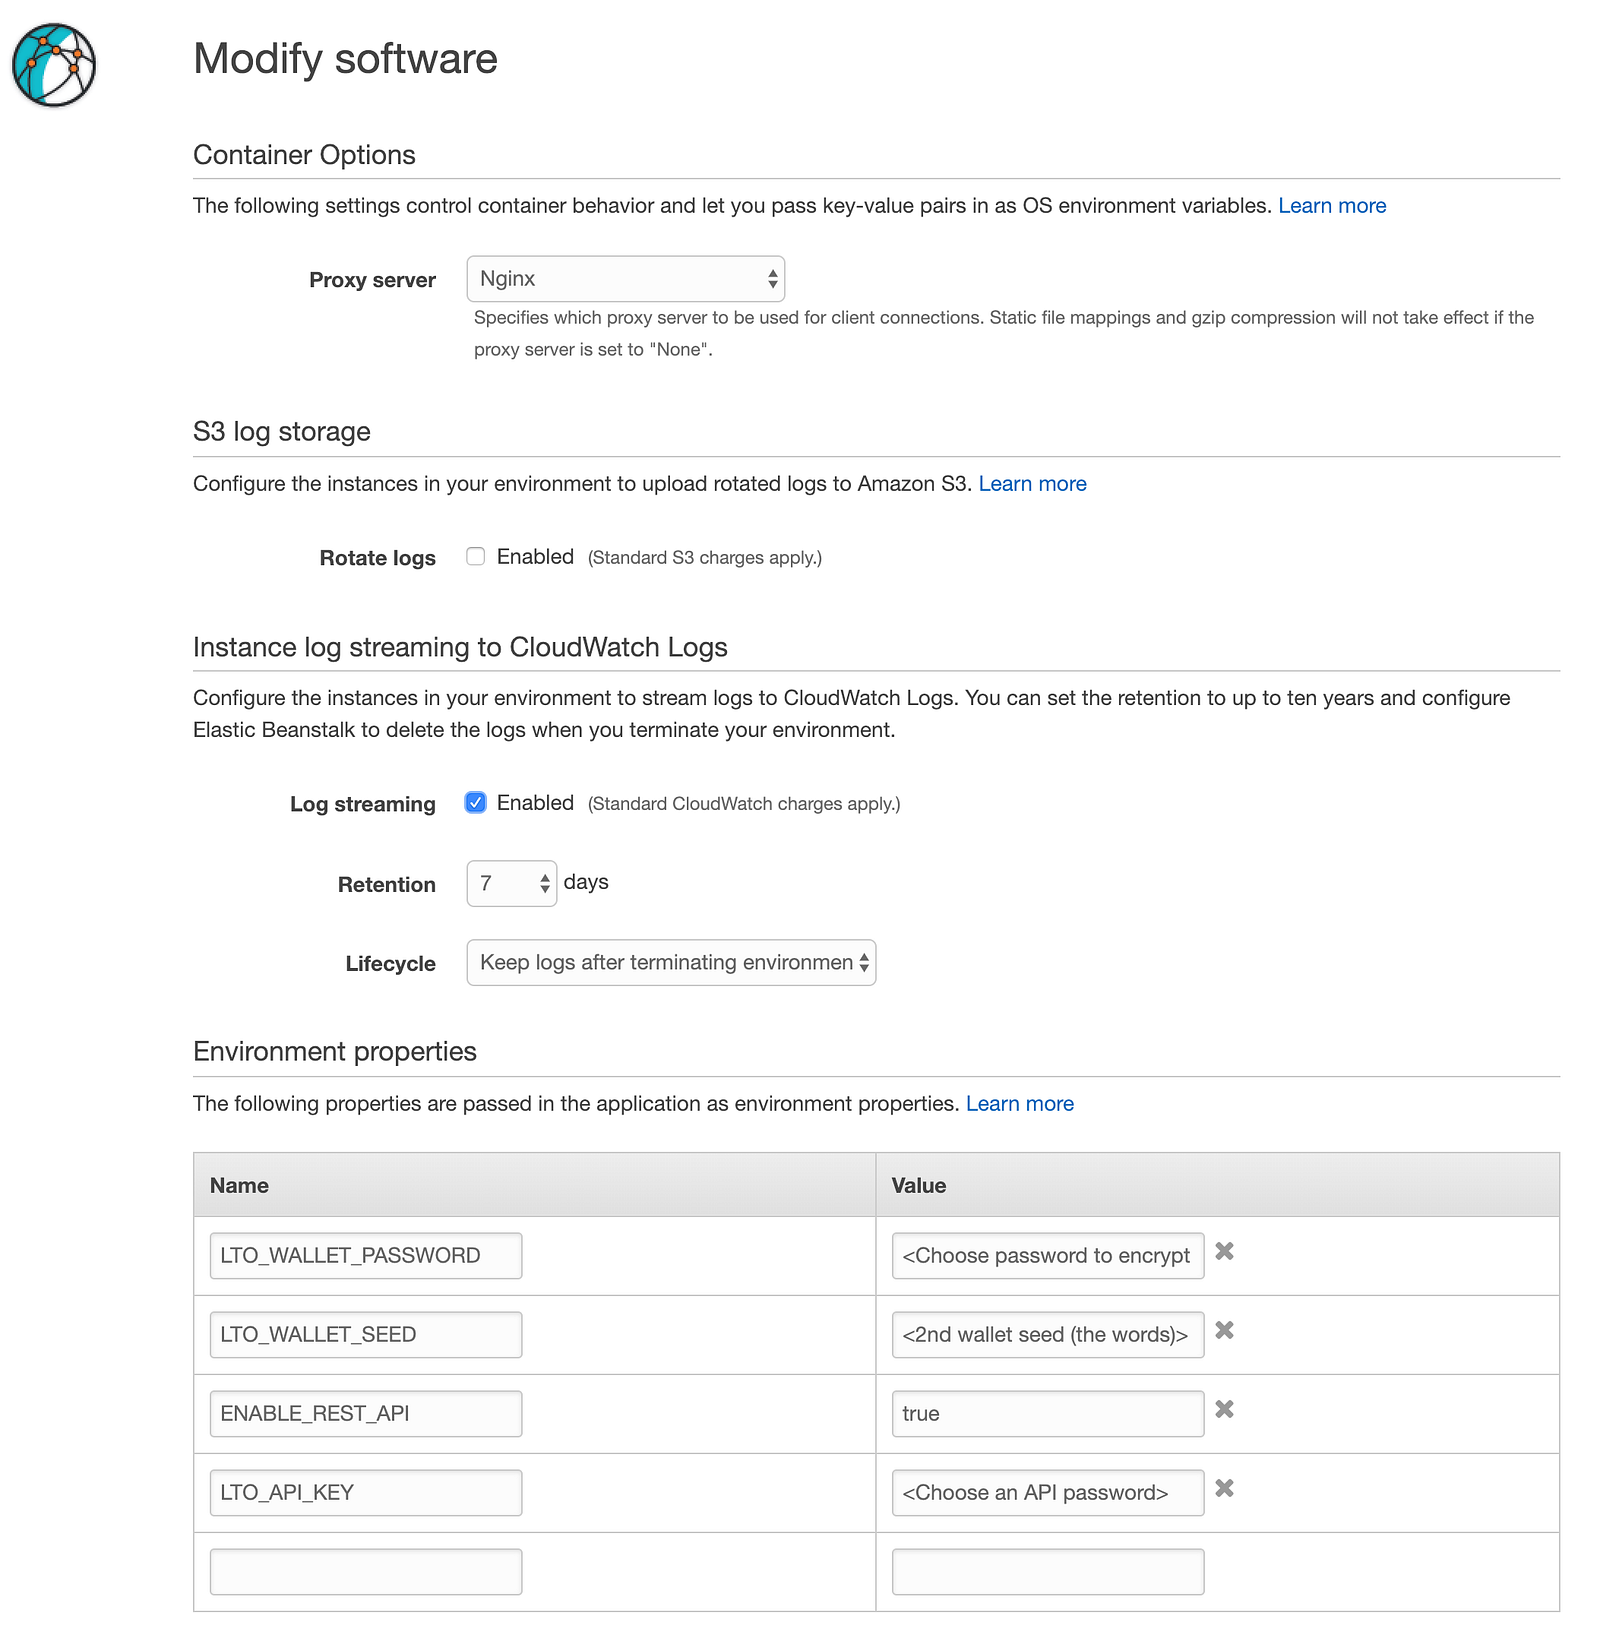
On the software screen you can choose to activate the Log streaming. Personally I find this very useful. To activate check the Log streaming box like shown in the screenshot above.
2nd is to setup the Environment properties. Depending on your wish to activate the API you configure just the first 2 variables or configure all of them.
Both LTO_WALLET_PASSWORD and LTO_API_KEY are fields for which you choose the value. The LTO_WALLET_SEED is your official wallets seed. In this example we use the seed (the mnemonic phrase / the list of words) of the 2nd wallet we created.
Finished configured the environment properties you can click “Save” and then “Create environment”.
AWS will now create the Elastic Bean Stalk application based on the Dockerfile (the file you uploaded) and parameters you specified. Please give this process a few minutes to complete.
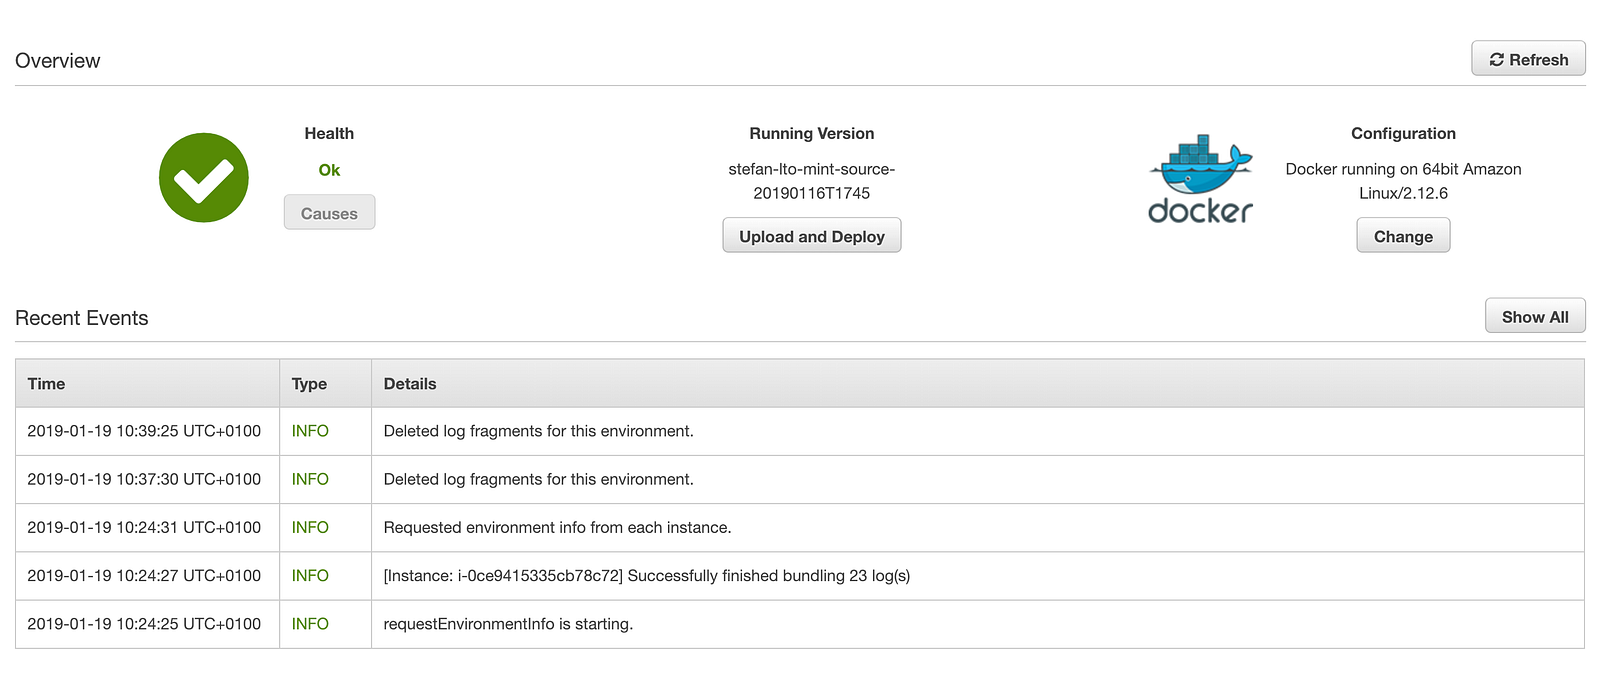
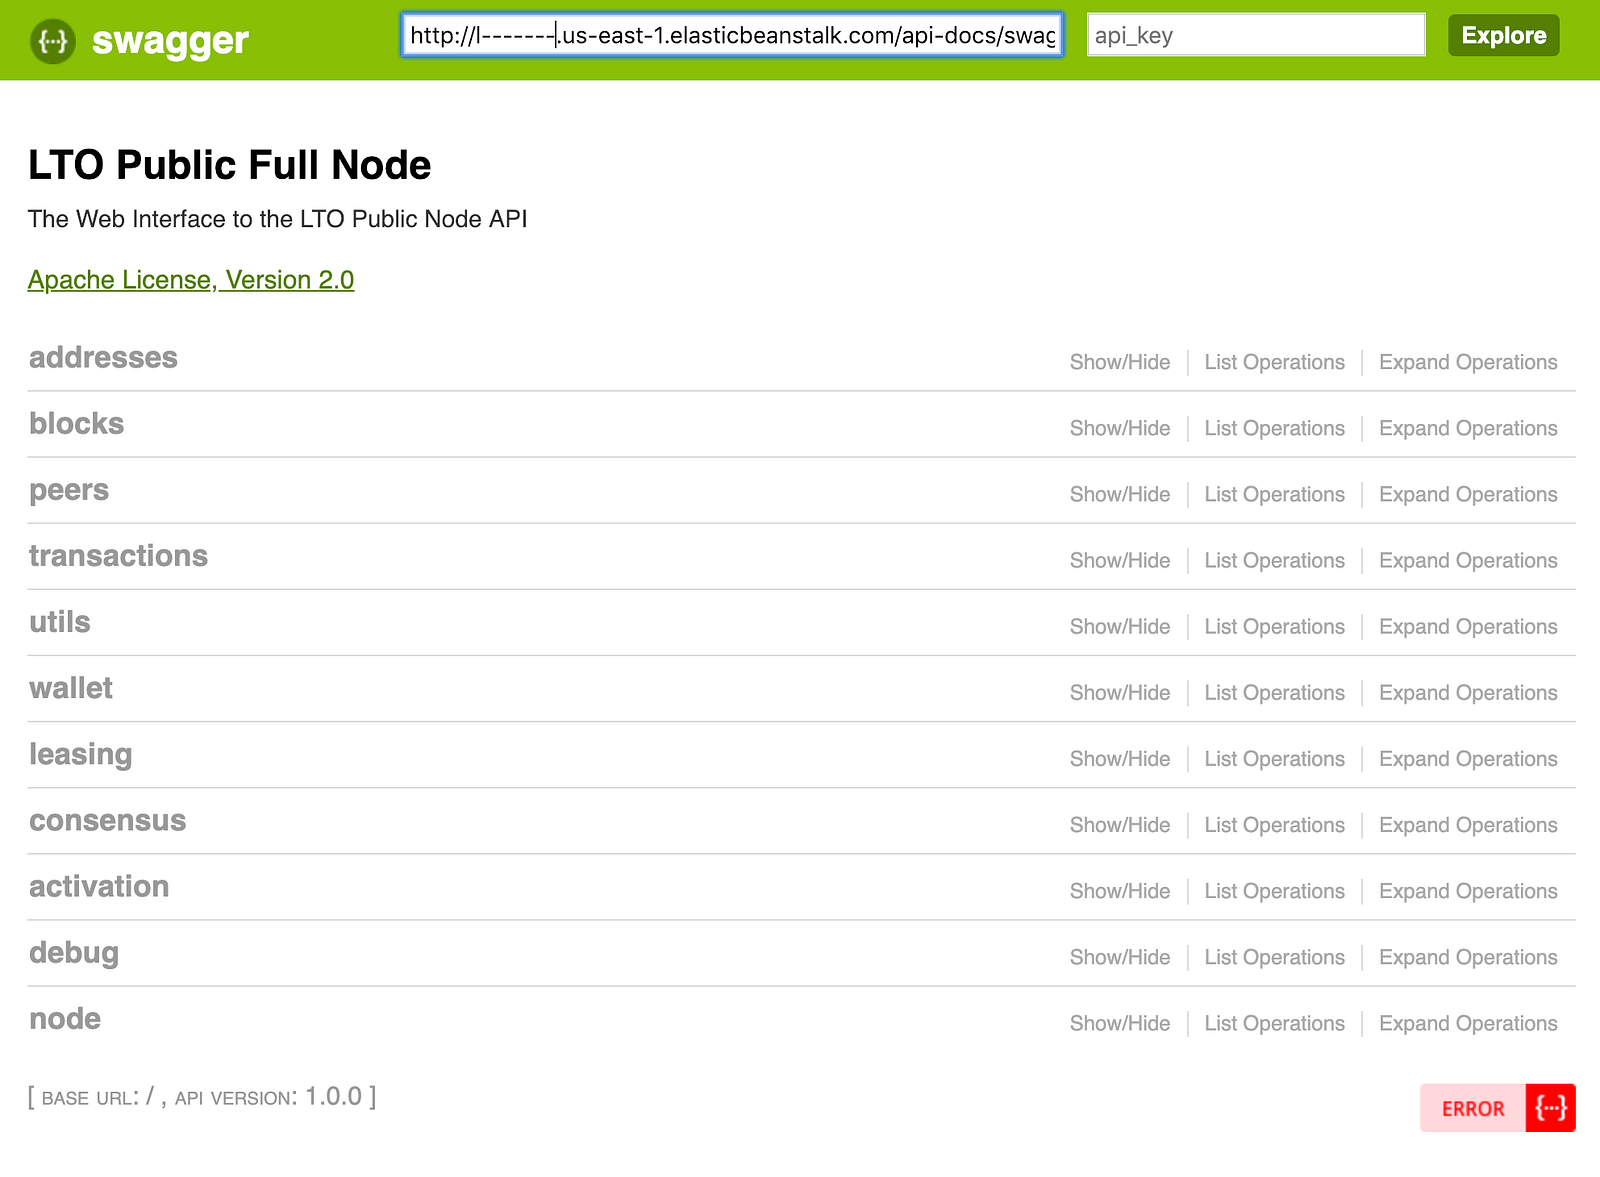
If you have enabled the API (assuming you configured all 4 environment properties) you can connect to your node through your favorite webbrowser.
Step 3: Wait for a 1000 blocks
You can find the LTO Network Explorer at https://explorer.lto.network. It shows you the blocks generated, by who, when, how big they are and how many transactions are in the block.
After launching your node check the Explorer to see the number of the last block. Wait till another 1.000 blocks are generated and expect your node to be part of the LTO Network.
Utilize the available Community Tech Tools to get more insights into the network and your participation. Let's build a secure and useful network together!
Depending on your stake (the number of LTO tokens you have in the “2nd wallet”) it will take more or less time for you to start earning LTO. Be patient and be happy. Welcome to the amazing LTO Network community! Read more about community programs.
Last updated